How to change DNS settings on Windows
For a simpler setup, consider using Private DNS (DNS over HTTPS) which is available on Windows 11 and later.
Windows 11 / Windows Server 2022
Open Network Settings
Right-click the network icon in the taskbar:
![]()
Select Network and Internet settings:

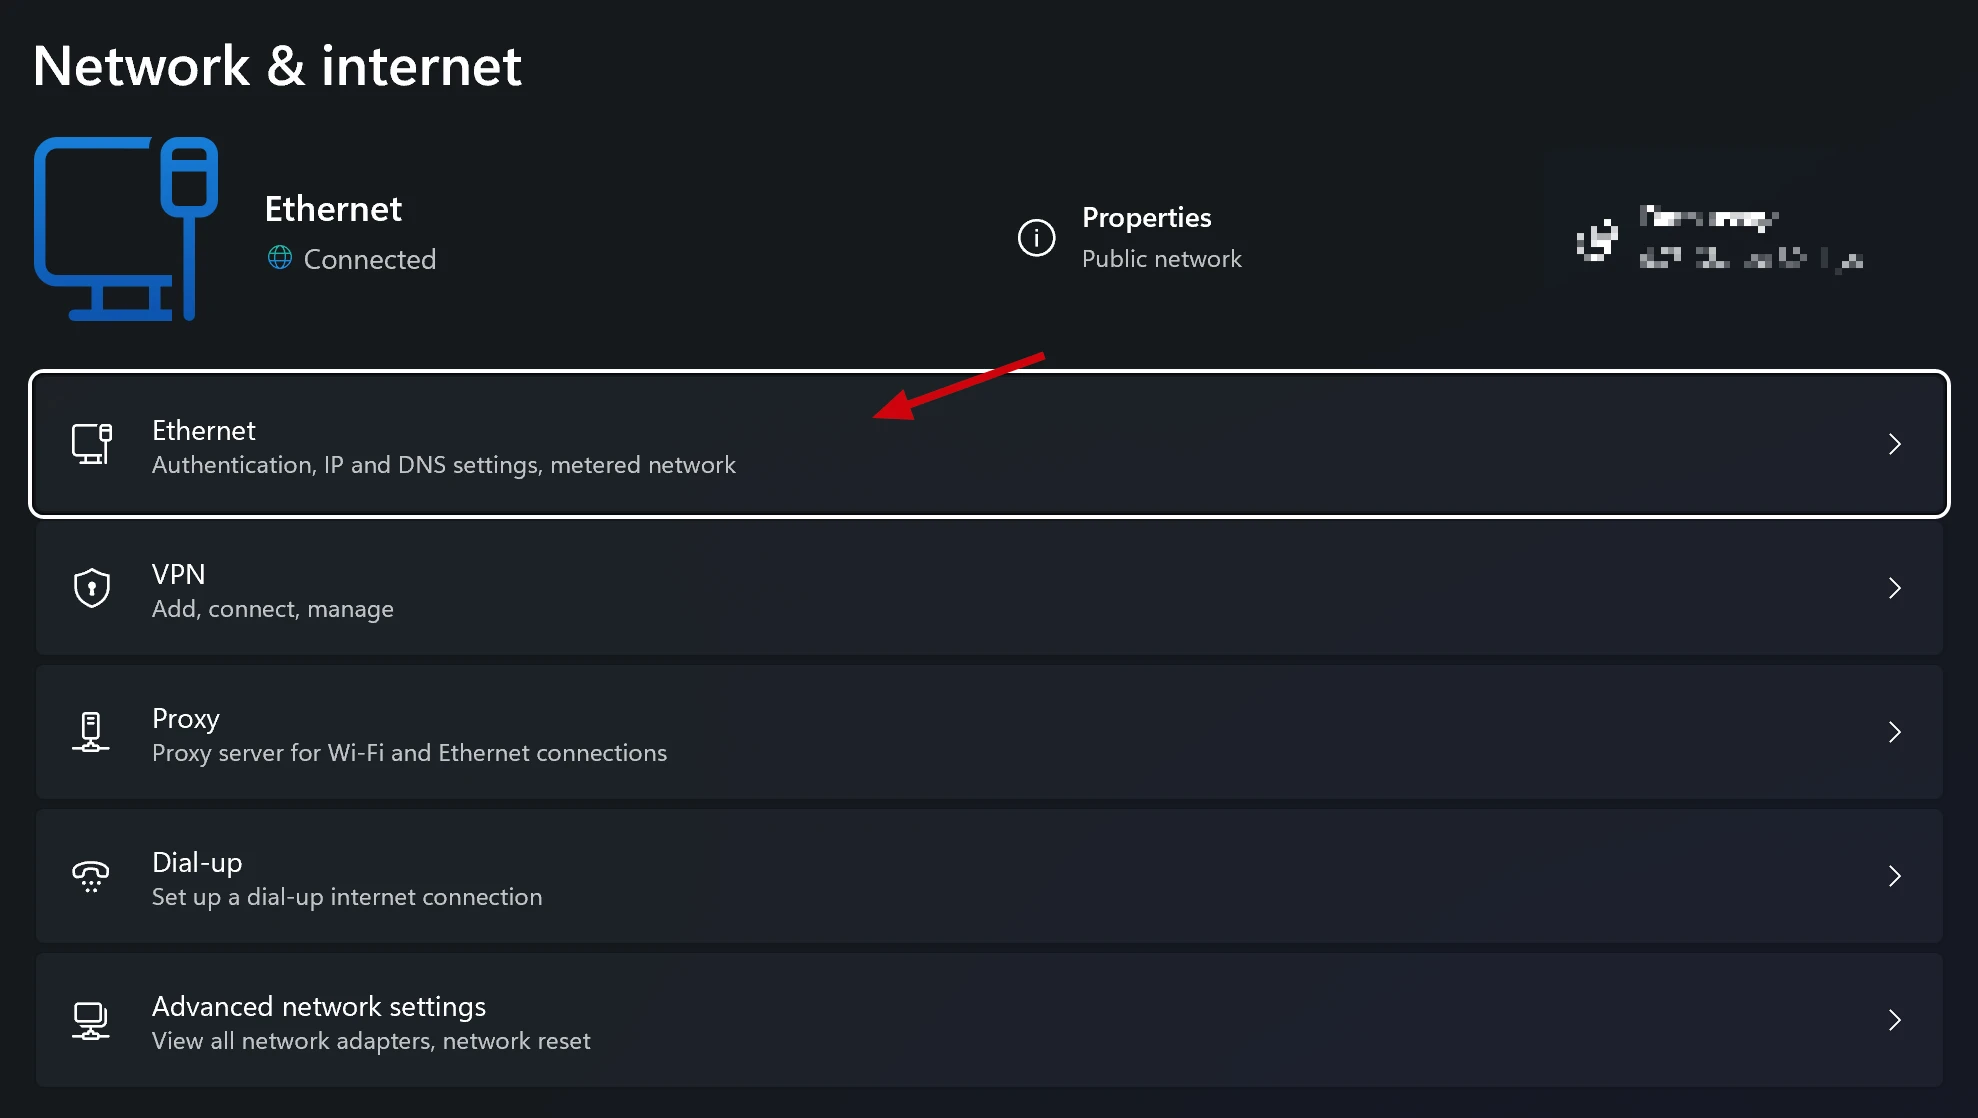
Click Ethernet or Wi-Fi depending on your connection type:
Configure DNS Servers
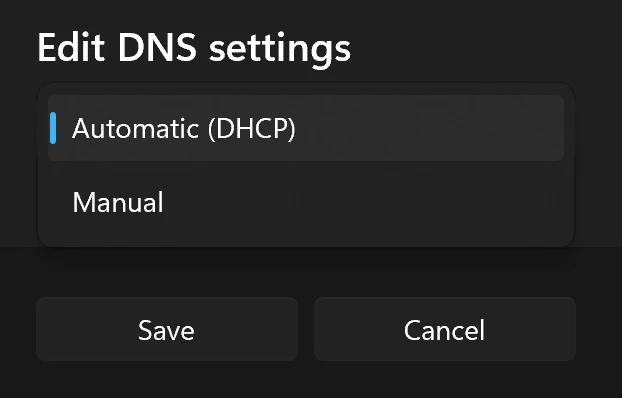
In the DNS server assignment section, click Edit:

Change from Automatic (DHCP) to Manual:
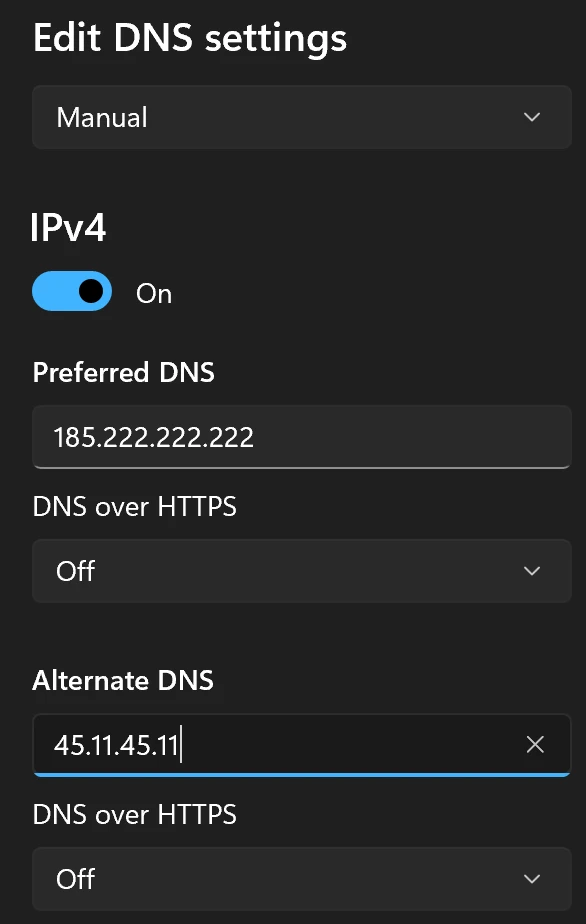
Enter the following DNS servers:
IPv4
| Setting | Value |
|---|---|
| Preferred DNS | 185.222.222.222 |
| Alternate DNS | 45.11.45.11 |
IPv6
| Setting | Value |
|---|---|
| Preferred DNS | 2a09:: |
| Alternate DNS | 2a11:: |
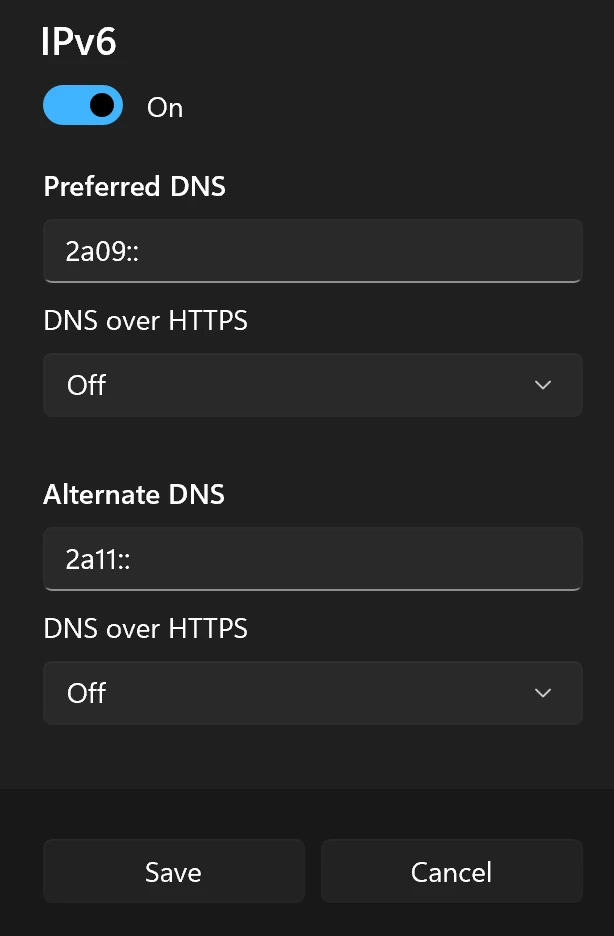
Click Save to apply the changes.
Windows 10 / Windows Server 2019
Open Network Settings
Right-click the network icon in the taskbar:
![]()
Select Open Network & Internet settings:

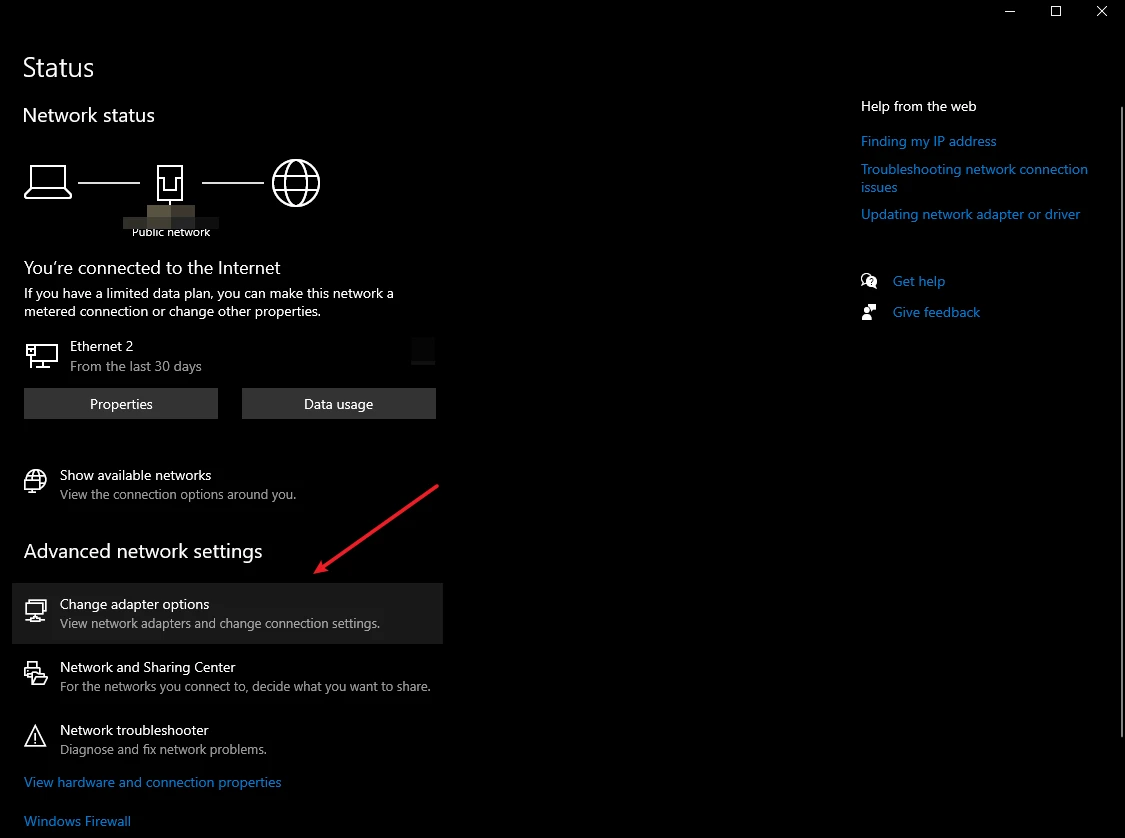
Click Change adapter options:
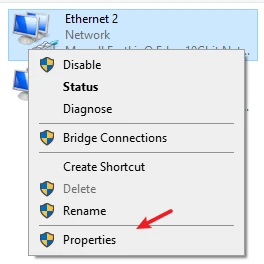
Right-click your active network adapter and select Properties:
Configure IPv4 DNS
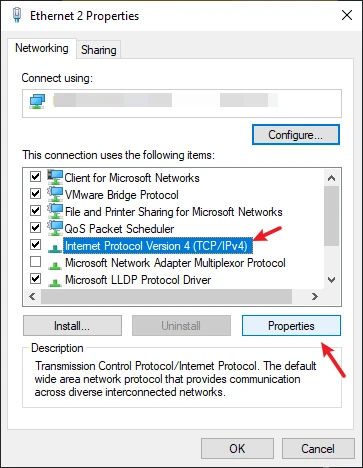
Select Internet Protocol Version 4 (TCP/IPv4) and click Properties:
Select Use the following DNS server addresses and enter:
| Setting | Value |
|---|---|
| Preferred DNS server | 185.222.222.222 |
| Alternate DNS server | 45.11.45.11 |
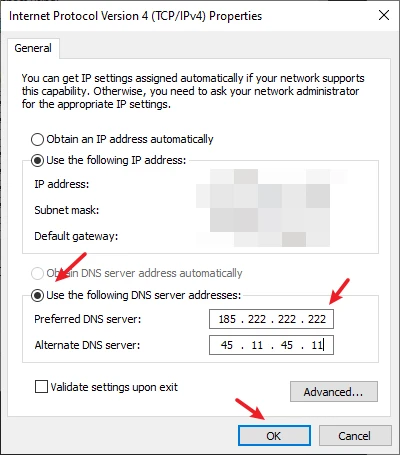
Click OK to save.
Configure IPv6 DNS
Select Internet Protocol Version 6 (TCP/IPv6) and click Properties:
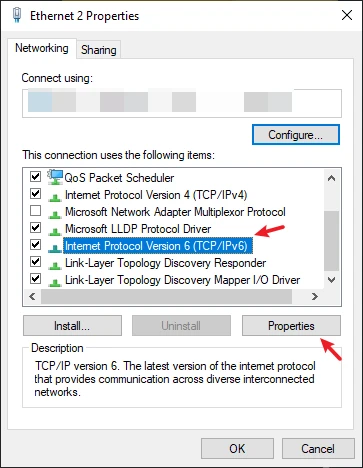
Select Use the following DNS server addresses and enter:
| Setting | Value |
|---|---|
| Preferred DNS server | 2a09:: |
| Alternate DNS server | 2a11:: |
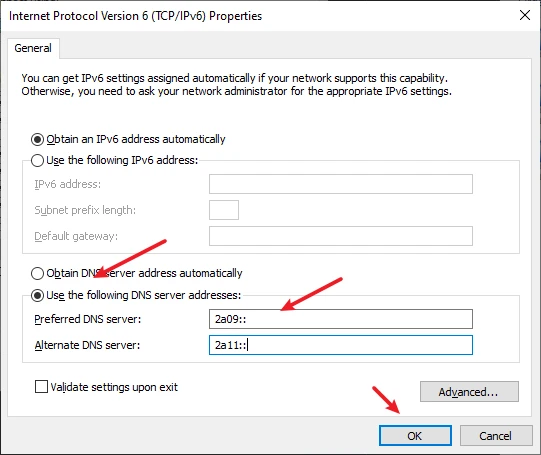
Click OK to save.